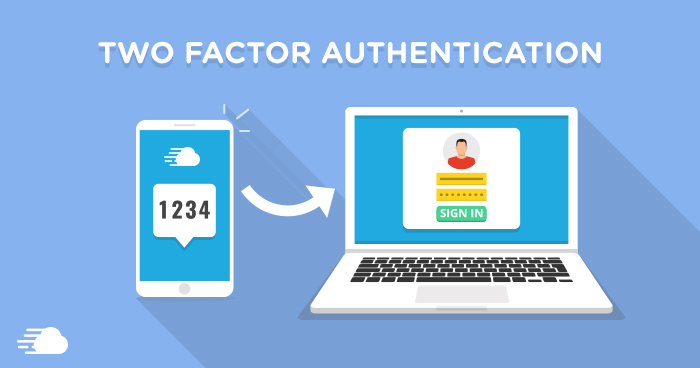
In the world where rising incidents of data theft and cyber attacks are concerning users, two-factor authentication (2FA) comes to the rescue from all this hassle. The 2FA is a process or standard, which is used for safety of your online accounts. The process offers web services secondary access to the owner of the account. Hence, users will get to know if somebody is meddling with their accounts. Basically, the 2FA comprises an email address or a phone number.

Hence, if you need to lower the risk of compromising your online accounts, then it is a must for you to enable the 2FA for all your accounts. Today, we will tell you how you can enable this feature for your different accounts. Let us begin.
For Apple Accounts
Before moving on with the process, let us make clear that the 2FA feature only works on devices running on iOS 9 or macOS X El Capitan and above. Let us begin.
iOS
If you need to enable the 2FA for your iPhone, here are the steps that you need to follow.
Step 1: If you are using iOS 10.2 or earlier, all you need to do is head to Settings >> iCloud >> Apple ID >> Password & Security.
Step 2: If you are using iOS 10.3 or later, go to Settings >> [Your Name] >> Password & Security.
Step 3: Next, turn on the 2FA to get a text code every time you sign in.
macOS
If you need to turn the 2FA feature on for your macOS devices, here are the steps that you need to follow.
Step 1: On the main screen, click the Apple logo present in the upper corner.
Step 2: Go to System Preferences >> iCloud >> Account Details.
Step 3: Next, tap the Security tab and turn the 2FA feature on.
Moving on the social media, let us begin with Instagram to let you know how to turn on 2FA for your account. One thing to note here is that the 2FA feature can be activated only from the app and from the browser. Here are the steps that you need to follow.
Step 1: Open the app and tap the hamburger menu logo present in the upper corner.
Step 2: Below Accounts, tap “Two-Factor Authentication” tab. All you need to do is toggle the switch on “Require Security Code” option to get the code on your phone number every time you sign in.
Seeing the present condition of Facebook and all the scandals that it is wrapped in, we recommend you to turn on the 2FA feature on a high-priority basis. This will increase the odds of your account being secure from bad actors. All you need to do is follow the given steps below.
Step 1: Open the app and tap the hamburger menu logo present in the upper corner.
Step 2: Tap the Settings option and go to Security and Login.
Step 3: Below “Use two-factor authentication” tab, you will see the option to enter your contact number to get a code every time you sign in. You can also opt for Facebook to send a notification to your number when somebody tries to log in, so that you can deny it.
Step 4: Last, but not the least, you can also add your device under “Trusted Devices” if you use the same device to log in.
Next in our list is the micro-blogging site, Twitter, which has a huge user base all over the world. And hence, it is necessary to enable the 2FA feature for your Twitter account as well. Here is a step-by-step guide on how you can enable the 2FA feature.
Step 1: Unlike Instagram, you can enable this feature from mobile as well as desktop version. All you need to do is click your profile pic.
Step 2: Next, look for the “Settings and privacy” menu. Once you find it, click it.
Step 3: Go to Account >> Security. Now, toggle the switch on “Login verification” option so that the platform will send you code every time you log in.
Step 4: In addition to this, you can also generate a backup code in case you do not have connectivity. You can also create a temporary password in case you need to login from different device. All these options can be seen in Security.
Amazon
On the verge of becoming the top global leader, Amazon is present in each and every corner of the world. Hence, almost every individual owning a smartphone has an Amazon account. Let us know how to enable 2FA for Amazon account. Here are the steps that you need to follow.
Step 1: Visit the home page and sign in.
Step 2: Go to your Account page and tap “Login & Security.”
Step 3: Next, click on the edit option for “Advanced Security Settings.” Next, click “Get Started.” Amazon will provide you on-screen instructions for enabling the 2FA. That’s it!
The search behemoth is one of the most used services. Almost 8 out of 10 people all over the world have a Google account. Hence, you can imagine the amount of users taking pleasure of the service. In order to enable the 2FA feature, here are the steps that you need follow.
Step 1: Go to the 2FA landing page of the Google account and click “Get Started.”
Step 2: Next, you will be sign in and enter your contact number before opting to get codes. You can get the code either by text messages or by calls.
Step 3: You can also opt for prompts that will simply ask to click “Yes” or “No” when you or someone tries to log in. Doing this, will enable the 2FA for all the Google services (such as Maps, YouTube, Gmail, and so on) linked to the account.
Snapchat
Moving on to one more social media major, let us see how you can turn on the 2FA for Snapchat. Here are the detailed steps.
Step 1: Open the app and click on the Settings icon.
Step 2: Go to My Account and click the Login Verification option.
Step 3: Chose SMS get a code every time you try to sign in. You can also add trusted devices after you are done with enabling 2FA feature.
Being the most popular messaging service, it is hard to believe if this one does not have a 2FA feature. Well, that’s not true. Here are the steps that you need to follow.
Step 1: Open the app and go to Settings.
Step 2: Go to Accounts >> Two-step verification and turn on the toggle.
Step 3: Set up a PIN and enter the email address. You are done for the day.
Cutting to the chase, you just had a look at how to set up 2FA for some of the essential online accounts that users have all over the world. In case you have any doubt, please feel free to ask any queries by commenting below. In addition to this, do let us know your feedback by commenting below.


